Sign In

  • Forgot your password?
  • Need a new account?

Register


Integrated Type Infrared Pyrometers | SIMTRUM Photonics Store

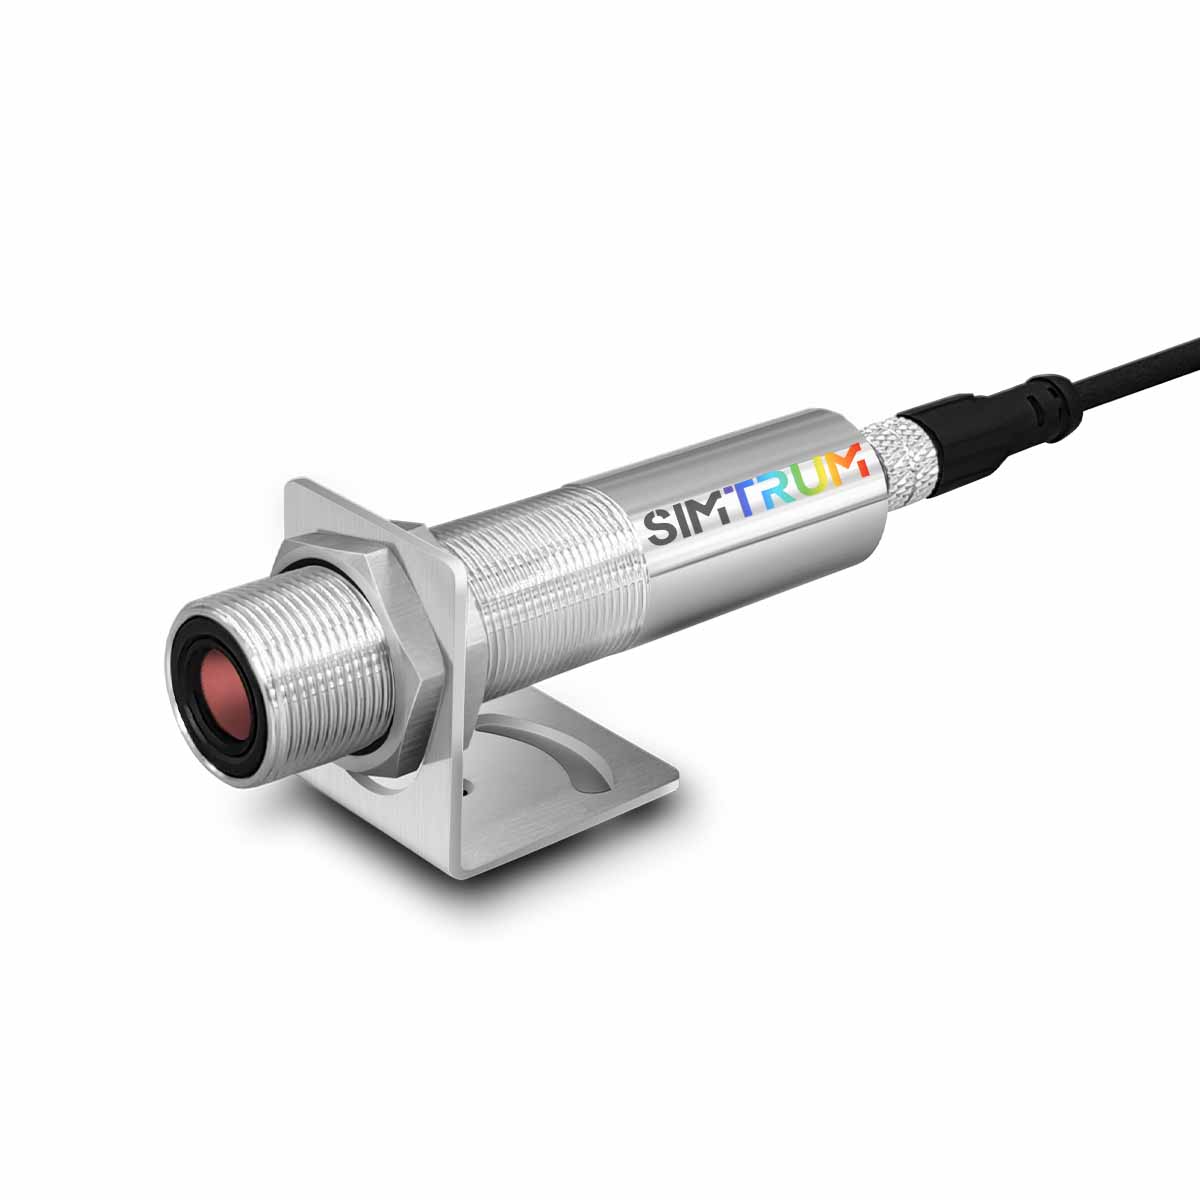
Integrated Type IR Pyrometers
The IR pyrometer is a non-contact temperature measurement instrument designed based on the infrared radiation characteristics of objects. It features "fast response (millisecond-level temperature measurement), wide measurement range (-40℃ ~1200℃), convenient operation, and strong environmental adaptability", as well as the advantages of no need to contact the object being measured, fast response speed, and adaptability to harsh environments. It is widely applied in multiple fields such as industrial production, scientific research experiments, and medical health. Its core function is to quickly and accurately obtain the surface temperature of objects, avoiding interference with the temperature field of the object being measured or damage to the instrument itself caused by contact temperature measurement.


Feature

  • Non-contact ir temperature sensor±1°C/1% measurement accuracy
  • Multiple temperature measurement ranges from -40°C~1200°C
  • The fastest response time is only 20ms(95%)
  • The emissivity (0.1 to 1.5) is adjustable
  • IP65 protection rating
  • Optional simultaneous output of analog quantity and RS485
  • Supports the Modbus communication protocol
  • Made of stainless steel, it is more sturdy and reliable

IM-IT-IRP3/5

IM-ITC-IRP0

Model

IM-IT-IRP3

IM-IT-IRP5

IM-ITC-IRP0

Supply Voltage

12~24V

6~24V 0.1W

Temperature Measurement Accuracy [1]

±1℃/ 1%

±1℃/ 1%

Repeatability [2]

±0.5℃/0.5%

±0.5℃/0.5%

Maximum Temperature Range

【See Selection Table for Details】

-40~600℃

-40~1200℃

0~500℃

Minimum Spot Diameter

7mm

7mm

Optical Resolution

(10:1, 90% Energy)

Temperature Coefficient [3]

0.1K

Spectral Range

8~14um

Analog Temperature Resolution [4]

0.1℃/0.1%

Digital Temperature Resolution [5]

0.01℃

No Digital Output

Response Time (95%)

20~5000ms (Adjustable)

150ms (Fixed)

Emissivity

0.1~1.5 (Adjustable)

0.95 (Fixed)

Transmittance

0.1~1.5 (Adjustable)

1.0 (Fixed)

Output Signal Processing

Average, Median, Quantile, Peak Hold, Valley Hold

Average (Fixed)

Supporting Software

SensIRTS

None

Output Mode

Digital + Analog Output Simultaneously

Analog Voltage Output Only

Analog Output Specification

0-10V

0~5V

Analog Output Load

Max for current output: 500Ω

Min for voltage output: 100KΩ

Max for current output: 500Ω

Min for voltage output: 100KΩ

Voltage Output (Min): 30KΩ

Stabilization Time

10min

Digital Output Mode

RS485/Modbus

Analog Output Only

Alarm Range Setting

Digital Setting

None

Alarm Output

Digital Output

None

Cable Specification

6 Wires

3 Wires

Cable Length

2m (Default)

1m (Default)

Operating Temperature Range

-20~85℃

Storage Temperature Range

-40~85℃

Relative Humidity

10-95% Non-condensing

Vibration Resistance

10~150Hz, 1.5mm Double Amplitude, 2 Hours per XYZ Axis

Shock Resistance

50G, 10 Times per Direction on XYZ Axes

Mounting Dimension

M18×1

φ12×85

Housing Material

SUS 304

Protection Class

IP65

Weight

75g

70g

Mounting Bracket

Standard L-shaped Mounting Bracket and M18 Nut

Featured Function

This model allows users to customize the temperature range of analog output within the specified model specifications. For example, when selecting a model with 0-300℃, users can define the analog output range as 20-120℃ in SensIRTS software, and then the 0-20mA output will correspond to 20-120℃, thus improving the resolution of analog output, which is beneficial for the sensor to play a greater role within the range specified by the user.

Remarks

[1][2] Take the larger value, measured when the ambient temperature is 23±5℃ and the target is a standard blackbody at 100℃

[3] Calculated by measuring a standard blackbody at 100℃ at ambient temperatures of 40℃ and 80℃ respectively

[4] Resolution of analog output

[5] Digital resolution obtained by using DagaSensIRTS software or digital communication.


The relationship between spot size and distance:
 

Temperature measurement range code

Code

T range(℃)

Code

T range(℃)

Code

T range(℃)

Code

T range(℃)

A

-40

F

45

L

150

R

400

B

-20

G

64

M

180

S

500

C

0

H

80

N

200

T

600

D

16

J

100

P

250

U

800

E

25

K

120

Q

300

V

1000

For example: AR indicates that the temperature measurement range is: -40 to 400℃. BV indicates that the temperature measurement range is: -20 to 1000℃

Note: The temperature measurement range is not an arbitrary combination. The method of taking values is shown in the selection reference table.


Model

Temperature measurement range

Output

Configuration information

IM-IT-IRP3-AJ

-40~100℃

RS485&0~10V

2m straight power cord

IM-IT-IRP3-CJ

0~100℃

RS485&0~10V

2m straight power cord

IM-IT-IRP3-AN

-40~200℃

RS485&0~10V

2m straight power cord

IM-IT-IRP3-CN

0~200℃

RS485&0~10V

2m straight power cord

IM-IT-IRP3-AQ

-40~300℃

RS485&0~10V

2m straight power cord

IM-IT-IRP3-CQ

0~300℃

RS485&0~10V

2m straight power cord

IM-IT-IRP3-AS

-40~500℃

RS485&0~10V

2m straight power cord

IM-IT-IRP3-CS

0~500℃

RS485&0~10V

2m straight power cord

IM-IT-IRP3-AT

-40~600℃

RS485&0~10V

2m straight power cord

IM-IT-IRP3-CT

0~600℃

RS485&0~10V

2m straight power cord

IM-IT-IRP5-AI

-40~800℃

RS485&0~10V

2m straight power cord

IM-IT-IRP5-CI

0~800℃

RS485&0~10V

2m straight power cord

IM-IT-IRP5-AV

-40~1000℃

RS485&0~10V

2m straight power cord

IM-IT-IRP5-CV

0~1000℃

RS485&0~10V

2m straight power cord

IM-IT-IRP5-AW

-40~1200℃

RS485&0~10V

2m straight power cord

IM-IT-IRP5-CW

0~1200℃

RS485&0~10V

2m straight power cord

IM-ITC-IRP0-CJ

0~100℃

0~5V

1 m power cord

IM-ITC-IRP0-CN

0~200℃

0~5V

1 m power cord

IM-ITC-IRP0-CQ

0~300℃

0~5V

1 m power cord

IM-ITC-IRP0-CR

0~400℃

0~5V

1 m power cord

IM-ITC-IRP0-CS

0~500℃

0~5V

1 m power cord


Basic composition

The structure of the IR pyrometer is designed around the logic of "capturing radiation - converting signals - processing and calculating - outputting results", and its core components include four major modules:

  • Optical system: It is equivalent to an "infrared signal collector", composed of components such as lenses, mirrors or optical fibers. Its function is to converge the infrared light radiated by the object under test and focus it on the subsequent infrared detector, reducing the interference of ambient stray light and enhancing the signal strength.
  • Infrared detector: The core sensing component, responsible for converting the infrared radiation energy gathered by the optical system into measurable electrical signals.
  • Signal processing circuit: The electrical signals output by infrared detectors are usually weak and noisy. This module enhances, denoising, and digitizes the signals through amplification circuits, filtering circuits, A/D conversion circuits, etc. At the same time, it incorporates algorithms such as environmental temperature correction to eliminate the influence of external factors on the measurement.
  • Display and Output unit: Responsible for presenting measurement results and achieving signal interaction.


Working principle

The core operation of an infrared pyrometer follows the fundamental law of thermal radiation: any object with a temperature above absolute zero (-273.15℃) will continuously radiate infrared rays (an invisible light) outward, and the intensity and wavelength distribution of the radiation are directly related to the temperature of the object.


According to Planck's law of radiation, the spectral distribution of an object's infrared radiation varies with temperature. The higher the temperature, the shorter the peak wavelength of the radiation and the stronger the total energy of the radiation. According to the Stefan-Boltzmann law, the total infrared radiation power per unit area of an object is directly proportional to the fourth power of the thermodynamic temperature, which is the key basis for the conversion between temperature and radiation energy. The infrared pyrometer captures the infrared radiation of the object being measured through an optical system. The infrared detector converts the radiation signal into an electrical signal, which is then amplified, filtered and compensated by the signal processing circuit. Finally, it is converted into the surface temperature of the object according to the preset algorithm and the reading is output through the display unit. Some models can also synchronously transmit the temperature signal to the control system.


The emissivity of an object (a parameter characterizing the object's ability to radiate infrared rays, with a value ranging from 0 to 1) directly affects the measurement accuracy. Therefore, most infrared pyrometers have an adjustable emissivity function and can be calibrated according to the characteristics of the material being measured (such as metals and non-metals) to ensure accurate results.

The reference table for the emissivity of common substances is as follows:


Matter

Emissivity

Matter

Emissivity

Matter

Emissivity

Matter

Emissivity

Black fabric

0.98

Water

0.92~0.96

Sand

0.9

Alumina

0.2~0.3

Human skin

0.98

Ice

0.96~0.98

Fur

0.75~0.8

Chromium oxide

0.81

Asphalt

0.9~0.98

Snow

0.83

Carbon powder

0.96

Copper oxide

0.78

Cement

0.96

Glass

0.9~0.95

Black paint

0.97

Iron oxide

0.78~0.82

Concrete

0.94

Ceramic

0.9~0.94

Rubber

0.94

Zinc oxide

0.11~0.28

Soil

0.92~0.96

Gypsum

0.8~0.9

Plastic

0.85~0.95

copper

0.1~0.3

Marble

0.94

Lime

0.89~0.91

Matte paint

0.8~0.95

Stainless steel

0.45

Wood

0.9

Optical fiber

0.9

Lithium electrode sheet

0.8~0.95

Carbon steel

0.69

paper

0.7~0.94

Red brick

0.93~0.95

Graphite

0.7~0.8

Lead

0.6


Note: The emissivity data in the above table is for reference only. The actual emissivity of an object is affected by its surface shape and measurement method. Factors such as frosted surface, polished surface, painted surface, measurement Angle, and target temperature can all influence the actual emissivity.

Therefore, during the use of infrared temperature sensors, the emissivity of objects can be determined through the following methods. For objects with high reflectivity, first measure the surface temperature of the object using a direct-reading thermocouple, then align the infrared temperature sensor with the same area and modify the sensor's emissivity until the temperature is the same as the measured value. At this point, the emissivity can be used as the emissivity of the object. For objects with too low emissivity, it is necessary to use blackbody tape to indirectly measure the surface temperature of the object. Apply blackbody adhesive tape to the surface of a low-emissivity object, and then set the emissivity to 0.95 to measure its temperature.


Note: Even with the above Settings, there may still be errors between the sensor measurement values and the actual object temperature (as the emissivity of some objects changes at different temperatures). Therefore, the high measurement accuracy can be improved by on-site secondary calibration. The digital sensor is equipped with parameter Settings for user secondary calibration. Through these parameters, the secondary calibration of the sensor can be conveniently achieved.


(IRTSM3/5) adopts a six-line system, and the relevant indicators are as follows:

Indicator

IM-IT-IRP3/5

Core count and specification

6-core AWG26

Min. bending radius

25mm (Fixed installation);50mm (Mobile installation)

Lifespan

Bend 4 million times

Temperature range

-20 to 85℃ (Fixed installation);-5 to 80℃ (Mobile installation)

Types of connectors

Straight head connector (default);90° elbow connector (optional)

Standard length of the wiring harness

2m

Weight

75g


Definition of Wiring Harness

IM-IT-IRP3/5

IM-ITC-IRP0

Brown: Power supply positive (+)

White: Power ground (-)

Blue: RS485A+

Black: RS485B-

Gray: Simulated output location (-)

Pink: Analog output positive (+)

Brown :6~24V power supply positive

White: Power ground

Pink: Analog output


Wiring Diagram
Wiring diagrams of IM-IT-IRP3/5 series sensors
with power supplies and upper computers
Wiring diagram of IM-ITC-IRP0 series sensors
with power supply and upper computer

Schematic diagram of a sensor network composed of multiple sensors


Communication protocol

This protocol defines the communication rules and contents between infrared temperature sensors and upper computers as well as PLCS. Based on RS485 communication, the Modbus-RTU protocol has been implemented, which is well compatible with the two mainstream upper-level controllers, PC and PLC. Through this protocol, users can conveniently set multiple parameters of the sensor, read data and store it, which is convenient for later analysis.

Communication parameter Settings: The default communication parameters at the factory are as follows: Baud rate :57600, no parity,8 data bits, and 1 stop bit.

Content of Modbus-RTU protocol: The communication mode of this protocol is question-and-answer mode. The upper computer is the active controller (Master), and the sensor is the passive responder (Slave). In the question-and-answer mode, the active controller sends the corresponding request according to the protocol content, and then the passive responder with a specified ID responds to the request, executes the command, and feeds back the data or execution result.

NOTE:For more details about the agreement, please refer to the relevant content in the user manual section.


Software

Some models of sensors support RS485 communication output function, and parameters can be easily managed and set through the corresponding software.


With this software, the following functions can be achieved: automatically discovering sensors, reading and recording sensor temperature data, setting communication ids, setting the emissivity of the target object to be measured, setting the analog output range, and turning off the analog output.

Comparison of the measured area and the size of the light spot

To ensure accurate measurement, it is recommended that the size of the object to be measured be 1.5 futian larger than the size of the light spot. The measured temperature is the comprehensive temperature of the measured area. If the measured light spot is larger than the actual object, the measured temperature will include part of the background temperature, causing the measured value to shift towards the background temperature.


Confirmation of installation angles

To ensure accurate measurement, the Angle between the sensor's axis and the normal of the object being measured must be less than 45°. Due to the different measurement angles, the emissivity of the object being measured varies in a certain direction. Therefore, if the installation Angle changes, the emissivity needs to be reset.


Measurement of large-area high-temperature heat sources

When measuring large-area high-temperature heat sources, due to the scorching effect of the high-temperature heat source on the sensor, the temperature of the sensor will rise or change significantly and continuously, thereby affecting the measurement accuracy. At this time, a orifice plate can be installed in front of the sensor to block the heat source, which can improve the measurement accuracy and stability.


Product Dimensions
IRTSM3/5 series IR pyrometer
IRTSM3/5 series IR pyrometer external straight head connector
Schematic diagram of the installation bracket
IRTSX0 series IR pyrometer
 
Schematic diagram of L-shaped installation bracket
 

We can provide a variety of accessories to assist in measurement. The optional accessories are as follows:

Isolated USB-RS485 adapter:An RS485 port can be extended on a PC

Simple display instrument:Can be used to display the measured temperature

Black body adhesive tape:Can be used for temperature measurement or emissivity assessment of low-emissivity objects. The emissivity of the blackbody adhesive tape is 0.95

Laser collimator:Can be used for IRTSM series of infrared pyrometer auxiliary alignment of the measurement

Universal mounting frame:Be used for installing IRTSM series high-temperature meters and has the function of universal adjustment

Dust cover:Can be used in IRTSM series sensors to prevent dust and oil mist from contaminating the lens and improve sensor durability in harsh conditions.


Condenser hood:Infrared pyrometer measurement kit


USB direct reading thermocouple:Can be used to contact surface temperature, measuring the emissivity of auxiliary measuring objects.


We are here for you!


Drop us an email at info@simtrum.com to get the Best Price today.   Want more technical information? Click Here for the professional Customized System/ Solutions.


Don't have time to search the products one by one? No worries. you can download the full range of SIMTRUM Product Line Cards.

Click it now.


Want to stay closer to the Market Dynamics and Technological Developments? Just take 5 seconds to Sign In as a member of SIMTRUM, we will bring you the most up-to-date news. 

(Sign in button on the top right of the screen).


Search Reset
Compare Model Drawings & Specs Availability Reference Price
(USD)

Accessories

Compare Model Drawings & Specs Availability Reference Price
(USD)